


When you download and write a Live Kali linux distro to a usb stick, any changes you make will not be there the next time you boot the usb stick. However, you can add persistence to the installation if you want to build on to the installation, add and edit files and add databases. The following instructions and images will guide your through the steps that are required to create the Live usb distro with persistence.
To enable persistence for a live USB installation,
1) Download Kali Linux iso.
2) Download, install and open Win32 Disk Imager
3) Write the image to the usb stick.
4) Boot the live usb stick.
5) Open the terminal.
6) Run the command gparted
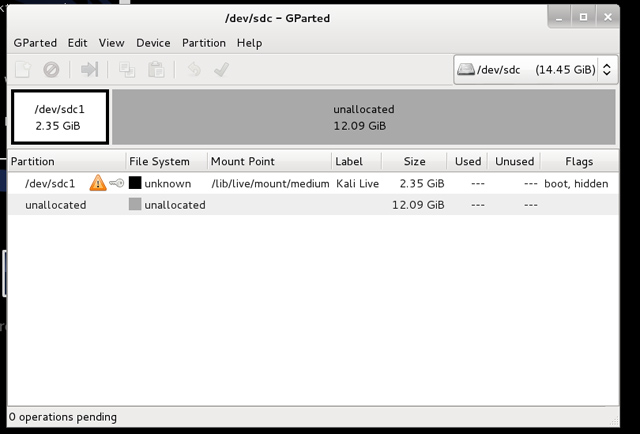
7) Create a new partition. In this example, a 16 gb usb is used. As you can see below, the installation used 2.35 gb and 12gb is unallocated. The primary partition that is used is sdc. The sdc partition is the usb stick. Sda and sdb partitions are on the physical hard drive. It is critical not to select the wrong disk or you could do serious hard drive damage.
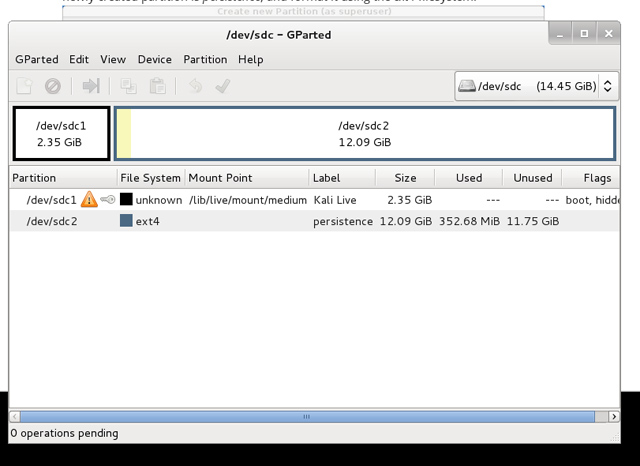
As you can see, gparted shows sdc1 uses 2.35 GB. This ia a logical partition. The unallocated space will become the sdc2 partition. Partitioning always works in a numberical sequence.
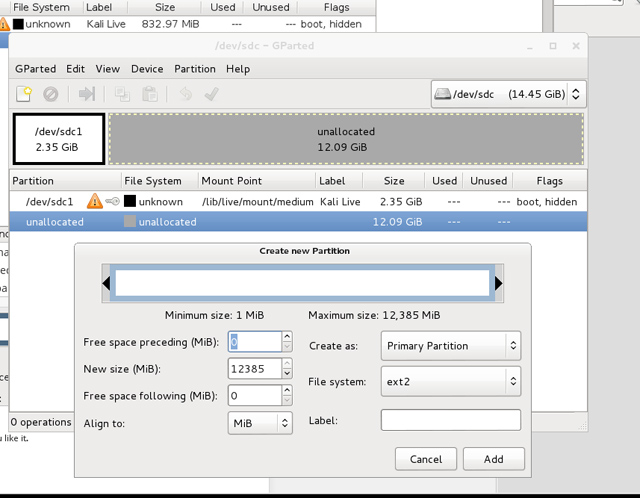
3) Select the Ext4 File System and add persistence to the Label field. Make sure unallocated is selected.
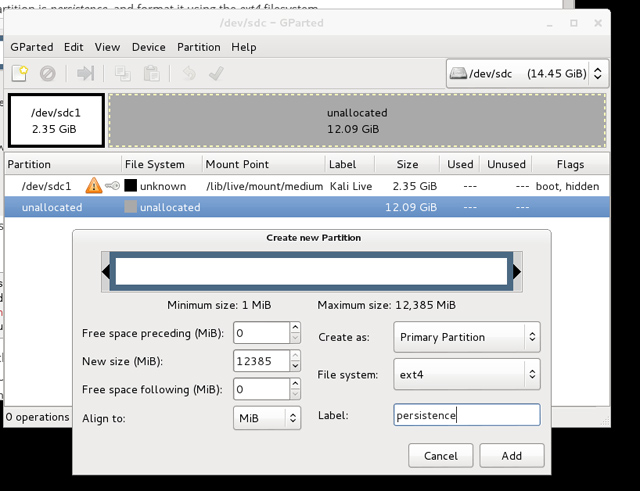
4) Select ‘Add’.
5) You now see the new partition on the list.
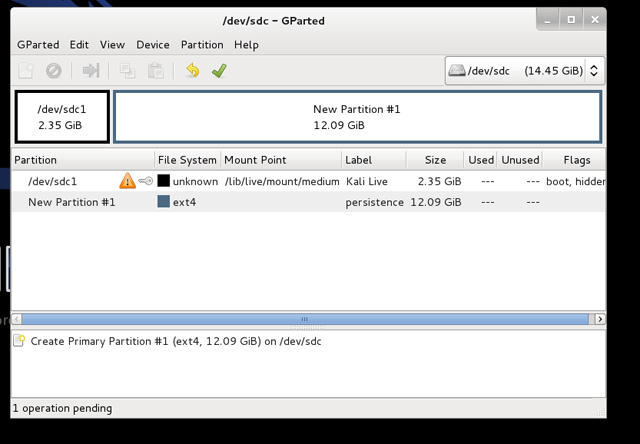
6) Run the operation.
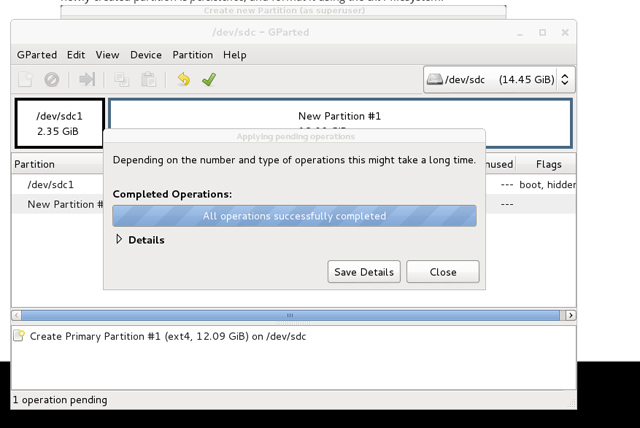
7) Select ‘Close’. Now, you see the new sdc2 partition added to the list and no pending operation.
Now, you need to open a terminal and add the following commands.
What did those commands do? Firstly, you created a new directory that will be used to mount the sdc2 partition. Then, the sdc2 partition is mounted at the location /mnt/usb. The ‘echo’ command appends a new line of text to the persistence.conf file. Finally, the partition is unmounted using the ‘umount’ command.
Now, you can reboot your computer with your usb plugged. As you should know, the boot order should have usb preceding the hard drive. When Kali boots up, you can select from a list of option. But, you select the ‘Tab’ key on your computer, then the space bar, and finally type ‘persistence’.

Owner of Fullstack Web Studio

Quality Coding

Digital Marketing
When Performance and Flexibility Matters
Affordable web design,custom web development and mobile apps for individuals and businesses.


Let us analyze your data and competition to acquire more traffic! Professional SEO content writer
© 2018 ALL Rights Reserved | Sitemap
Vancouver | North Vancouver | Burnaby | Richmond | Coquitlam | Port Coquitlam | Surrey | Langley | Maple Ridge | Mission | Abbotsford | Kamloops | Kelowna | Victoria | Squamish | Whistler | Pemberton