


The Raspberry makes is a fantastic device that allows you to stream live video and record motion detection. As long you have a webcam that is compatible with the Raspberry Pi, you have the basic hardware to accomplish such a task.
In order to get started with live streaming and motion detection, you need to install the Linux package titled ‘motion’. Motion will handle the process of streaming and recording video. Normally, out of the box, it just works.
Installing Motion on Linux
apt-get install motion
Configuring Motion
After motion is installed, you will need to open a couple of files and make some simple edits. The two main files are /etc/motion/motion.conf and /etc/default/motion. Below are some code blocks that will need to be changed in order to broadcast streaming video or record motion detection.
motion.conf
daemon on webcam_localhost off control_localhost off
motion
This file, located in the /etc/default folder requires a single change.
start_motion_daemon=yes
Adjustments
After the initial options are set, you may want to customize your setup. Below, are a few examples of customization; like setting the framerate equal to that of the webcam.
//motion.conf
framerate 30 // default 1
quality 90 // default 70
Out of the box, it will record motion. But, it is sensitive to a single frame of motion. In some instances, flickering light could make it start recording a brief sequence. In order to combat this, you can increase the amount of frames that need to be contain motion.
minimum_motion_frames 5
Now that the cam actually runs and everything works, you can find the stored motion files in the directory defined by the target_dir option that is set in the motion.conf file. By default, the directory is tmp/motion.
Storing Motion Files On a USB Stick
If you run a Raspberry Pi on an SD card(in all likelihood), you may want to mount a usb stick on it so it records all motion to the usb stick. By doing this, you will cut down on writes to the sd card and keep files nice and organized.
To store images on a mounted USB stick,
1) get the USER ID
id -u pi
2) Add the user pi to fstab in order to mount for that user.
/dev/sda1 /home/pi/mount/storage vfat uid=1000,noauto,user,exec 0
3) Format a usb stick fat32
4) Mount it to a desired folder
5) Unmount it
6) Format it with mkfs.ext4. This format is critical to allow a user other than root to be able to have specified permissions with mounted media.
mkfs.ext4 /dev/sda1
7) Mount it again
8) Change folder permissions to 777
chmod 777 /home/pi/myfolder
9) Change owner to pi
chown pi:pi /home/pi/myfolder
When you can write to the mounted folders and they have the proper permissions, you can store the jpg images and swf files there.
Website Usage
Your Raspberry Pi will need a complete LAMP setup; or at least an installed web server like Apache. Once you have this, you can enable port forwarding in your router so your ip(or even a website) can be seen on the web via port 80. With port forwarding you can add other other forwarded ports to the router like 8080 and 8081, and port 22 for SSH, if desired.
By enabling an ssh port, you will be able to remote control all Linux boxes on your local network because once you can connect to one of them through the ssh port, you can easily connect to the others since they are all on the same local network.
Once you make the pages available to the outside world, you can create a web page that can be seen on the web with an src tag which embeds the streamed video. If you allow a local ip like 192.168.0.101 to be port forwarded with port 80, you make have a file like links to another inetrnal ip like 192.168.0.102.
All in all, you will use two Raspberry Pis on a local network that will be setup so that any other website can integrate the live streams into a webpage.
Then, you can use any other online webpage and add an iframe to the website url hosted at home.
GOOD REFERENCE
http://linux.die.net/man/1/motion
Varnish is an http accelerator (reverse proxy) that can be used to store copies of web pages that will be used to serve the web surfer instead of copying the page from the server. Essentially, websites that are delivered from the cache will display much faster than those that are not. Although Varnish can accelerate the page delivery, the ISP (Internet Service Provider) upload speed, page content, and browser caching will have very high impacts on the page load speed too.
Since Varnish can store the pages in memory, a small website that is optimized for performance can be quite efffective; especially if its size is well under the cache size that you set.
Although Varnish and a Raspberry Pi can be used to host a website under aquequate conditions, it can also be an excellent starting point to experiment with Varnish and its features before making major changes to a live server with many Virtualhosts and addon domains.
Here are the steps to setting up Varnish on the Raspberry Pi.
To install Varnish on the Raspberry Pi,
1) Become a sudoer to execute root commands.
pi@raspberrypi:# sudo -s
2) Open the /var/tmp folder
root@raspberrypi:# cd /var/tmp
3) View the files in the repository at http://repo.varnish-cache.org/source/.
4) Download a file like varnish-3.0.5.tar.gz.
5) Open the /var/tmp folder
root@raspberrypi:# wget http://repo.varnish-cache.org/source/varnish-3.0.5.tar.gz
6) Extract the file and change directory. When you compile and install from source you work from within the top folder. In this case, the folder is varnish-3.0.5.
root@raspberrypi:# tar xzf varnish-3.0.5.tar.gz root@raspberrypi:# cd varnish-3.0.5
7) Install dependencies
root@raspberrypi:# apt-get install autotools-dev autoconf libpcre3-dev libedit-dev automake libtool groff-base python-docutils pkg-config
8) Run autogen file and continue compiling and installing from source.
root@raspberrypi:# sh autogen.sh
9) Configure
root@raspberrypi:# sh configure --enable-diagnostics --enable-debugging-symbols
10) Make
root@raspberrypi:# make
11) Make install
root@raspberrypi:# make install
Note: If anything went wrong and you are doing a second attempt, run make uninstall and make clean. Make uninstall will remove the previously installed package.
12) Setup the necessary links
root@raspberrypi:# ldconfig -n /usr/local/lib/
13) Edit the configuration file default.vcl.
root@raspberrypi:# vi /usr/local/etc/varnish/default.vcl
or
root@raspberrypi:# nano /usr/local/etc/varnish/default.vcl
Note: You will need to uncomment some lines such as;
backend default { .host = "127.0.0.1"; .port = "8080"; }
Note: The port 8080 will be used by the web server.
14) Change the port from the web server. Normally, Apache or Lighttpd will use port 80. Change this to something else like port 8080.
root@raspberrypi:# vi /etc/lighttpd/lighttpd.conf
15) You can make a file to start the service or you can type or copy and paste the following command to start the Varnish service.
root@raspberrypi:# /usr/local/sbin/varnishd -f /usr/local/etc/varnish/default.vcl -a :80 -P /var/run/varnish.pid -s malloc,35m
Note:
The -f option tells Varnish where the configuration file is located. In the case, the file is located at /usr/local/etc/varnish/default.vcl
The -a option is the port that Vanish will use. In this case, Vanish will use port 80. Your router will allow port forwarding on the port.
The -P option is the PID file location which records the process id for Varnish. When you know the process id, it makes it easier to kill the service, etc.
The -s option tells where the cache is located and the size of the cache. In this case, the cache is 35m.
Find more about options at https://www.varnish-cache.org/trac/wiki/Performance.
Check if Varnish is Running
root@raspberrypi:# /usr/bin/pgrep -lf varnish

Check if Varnish is Working Properly
PHP Users can make a file called view_headers.php and use the get_headers() function to output the headers which hopefully includes some information about Varnish. The samples below show how to get headers from a URL.
print_r(get_headers("http://localhost", 1)); print_r(get_headers("https://example.org", 1)); print_r(get_headers("myIPaddress", 1));
You can run the file in a browser or via the command line. Running the PHP file at the command line is shown below.
root@raspberrypi:# php ./view_headers.php
If all goes well, the array will contain the line below. [Via] => 1.1 varnish PERL users can install the libwww-perl package to view headers.
root@raspberrypi:# apt-get install libwww-perl root@raspberrypi:# GET -Used http://localhost:80/
If all is working fine, you should something similar to the output below.
200 OK
Connection: close
Date: Sat, 11 Jan 2014 18:23:19 GMT
Via: 1.1 varnish
Age: 0
ETag: “3260290251”
Server: lighttpd/1.4.31
Vary: Accept-Encoding
Content-Type: text/html
Last-Modified: Sat, 14 Sep 2013 23:19:36 GMT
Client-Date: Sat, 11 Jan 2014 18:23:19 GMT
Client-Peer: 127.0.0.1:80
Client-Response-Num: 1
Client-Transfer-Encoding: chunked
Title: Welcome page
X-Varnish: 361868210
As your local network grows with the addition of new Raspberry Pis, you may want to keep your workload minimized by using SSH between Raspberry Pis. If you use SSH to connect from Pi to Pi, you can easily move files and program any Pi quickly and efficiently.
To connect to other Raspberry Pis with SSH, you will need to have SSH enabled. The simplest way to to enable SSH is to run the command ‘raspi-config’ from the command line. Then, simply select SSH and make sure it is enabled.
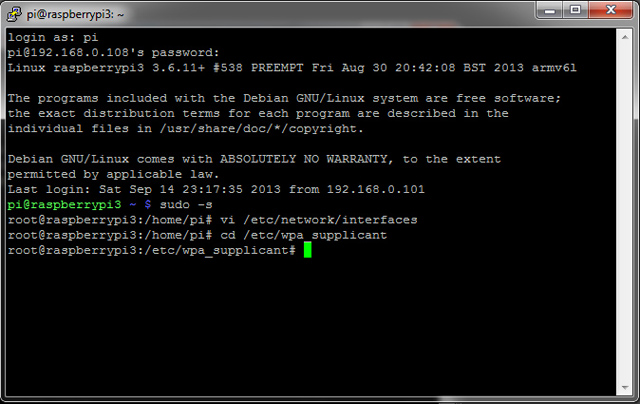
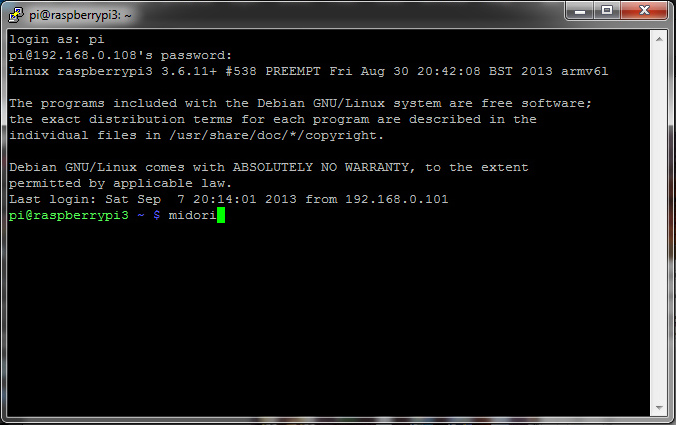
Once SSH is enabled, you can easily SSH into another Raspberry Pi on your local network. An example connection is shown below.
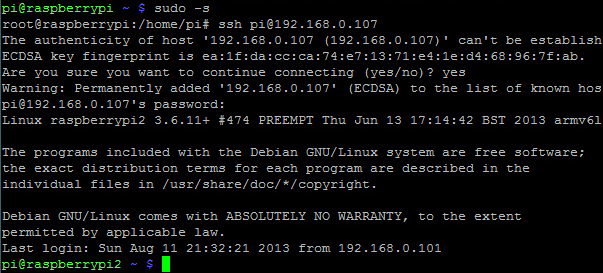
You have the Raspberry Pi with an installed operating system and it is connected to the Internet. In this case, it does not have a monitor you will use because you simply want to access and program it from the command line. Well, once you open Putty, you can connect and use the command line in less than a minute. The following steps will demonstrate this connection.
To connect to the Raspberry Pi,
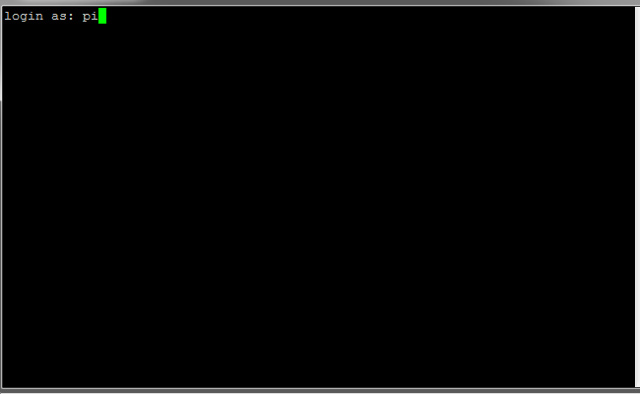
1) Open Putty (putty.exe).
2) Add the local ip address assigned by your router.

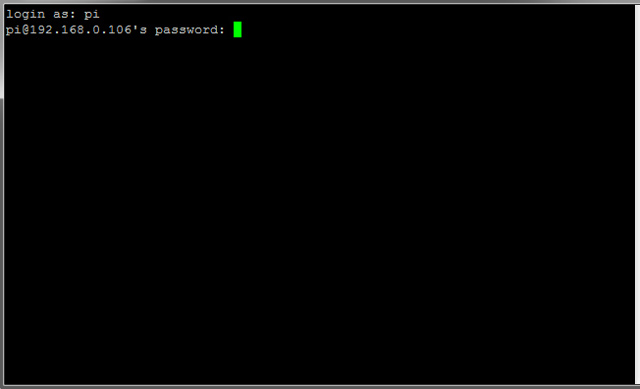
3) Login as ‘pi’. This is the default use with the Raspian operating system.
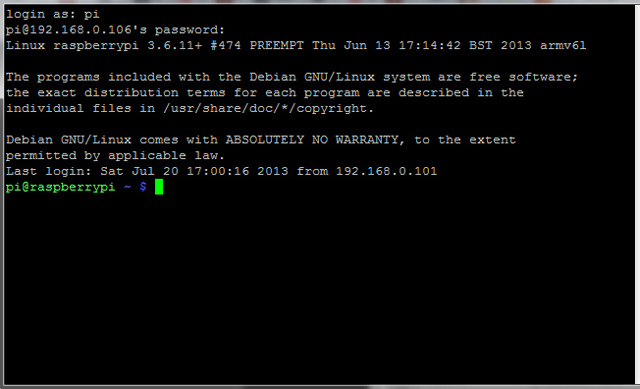
4) Type your password and hit ‘Enter’ on your keyboard. By default, the password is ‘raspberry’. You may want to change it to something stronger than that.
5) Congratulations. You are logged in and can use the command line.
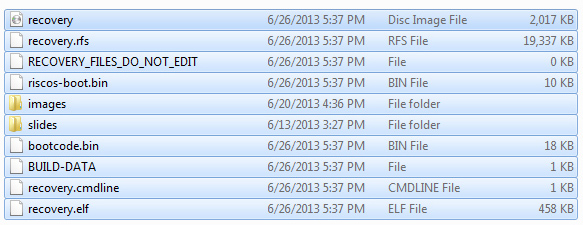
I will keep this blunt. This tutorial explains how to make a usable copy of the existing Raspian installation on your SD card. There are several reasons why you may want to do this operation such as; you want exact copies of your Raspian installation to use on other raspberry Pis, you want changeable installations on various usb drives and you want a backup in case your SD card malfunctions or becomes corrupted.
Once you have built a custom Linux installation, you can copy it to a USB drive and use it on your Raspberry Pi. To get started, all you need is a formatted fat32 USB stick.
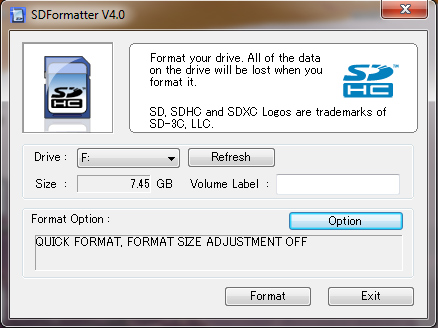
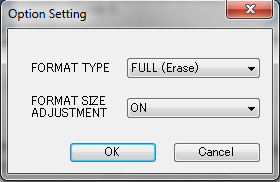
To format the USB stick in Windows,
1) Insert the usb stick into a usb port.
2) Select Start >Computer.
3) Right click the usb stick
4) Select format >fat32
5) Safely remove formatted usb stick.
To format the USB stick in Linux,
1) Insert the usb stick into a usb port. If you use Raspberry Pi (Raspian), Ubuntu or another OS it should mount right away. Check to see where it is mounted.
root@raspberrypi:/home/pi# df -h
2) Unmount the usb stick. In this case, it is mounted on /dev/sda1
root@raspberrypi:/home/pi# umount /dev/sda1
3) Format it with fdisk command unless you formatted it in Windows. If you formatted it with Windows, skip this step.
root@raspberrypi:/home/pi# fdisk /dev/sda1
4) Format it for Ext4.
root@raspberrypi:/home/pi# mkfs.ext4 /dev/sda1
5) Mount the usb drive.
root@raspberrypi:/home/pi# mount /dev/sda1 /media/usbdrive
6) Use the ‘dd’ command to move the data to the usb drive.
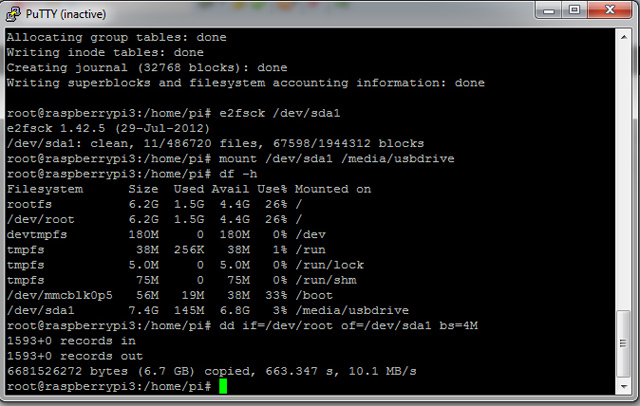
7) Resize the drive.These examples are show for the root user. To enable the root user on your Raspberry Pi or Linux, simply type ‘sudo -s’. Otherwise, you can always use the default user ‘pi@raspberrypi ~ $’ with sudo in front of the command.
root@raspberrypi:/home/pi# resize2fs /dev/sda1
On top of that, you may want to note that you can always open up the Linux package Gparted and show the usb device. Then, you can unmount it and resize the unallocated space to the desired partition.
8) Change this line to boot the usb next time the Pi restarts.
root@raspberrypi:/home/pi# vi /boot/cmdline.txt
or
root@raspberrypi:/home/pi# nano /boot/cmdline.txt
9) Change ‘root=/dev/root’ to ‘root=/dev/sda1’
10) You may want to make changes to the /etc/fstab file too. The code below will show to mount it upon boot.
proc /proc proc defaults 0 0 /dev/mmcblk0p8 /boot vfat defaults 0 2 /dev/mmcblk0p9 / ext4 defaults,noatime 0 1 /dev/sda1 /media/usbdrive ext4 uid=1000,noauto,user,exec 0 0
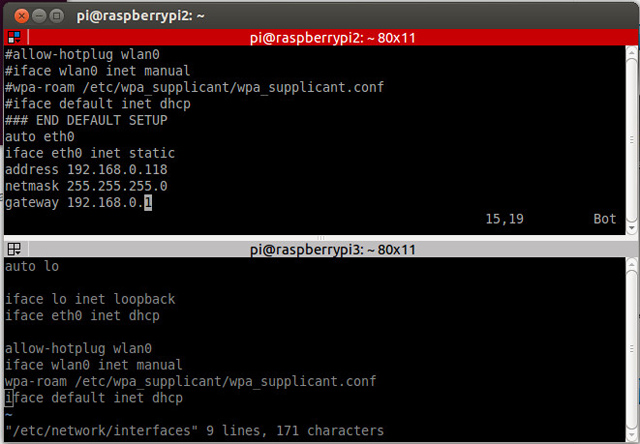
This tutorial explains how to create a static ip address for your Raspberry Pi.
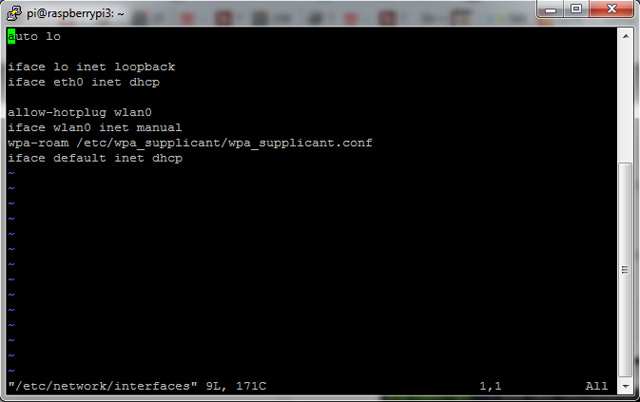
The file for which you will edit is called ‘interfaces’ It is located within the /etc/network folder.
Why do I want to do this? There are many reasons why you may want to create a static ip address for a Raspberry Pi. Some of the reasons could be that you want to run a web site on a Raspberry Pi or run a cluster of Raspberry Pis. If you attempt to so this with dhcp, dynamic changing ips will make port forwarding and other setups a hassle that will need ongoing changes. Also, if you have several customized Raspberry Pis, you may like to ssh into any one of them with known ips in order to be efficient.
To access the interfaces file,
1) Open the file.
root# cd /etc/network root# vi interfaces
auto eth0 iface eth0 inet static address 192.168.0.118 netmask 255.255.255.0 gateway 192.168.0.1
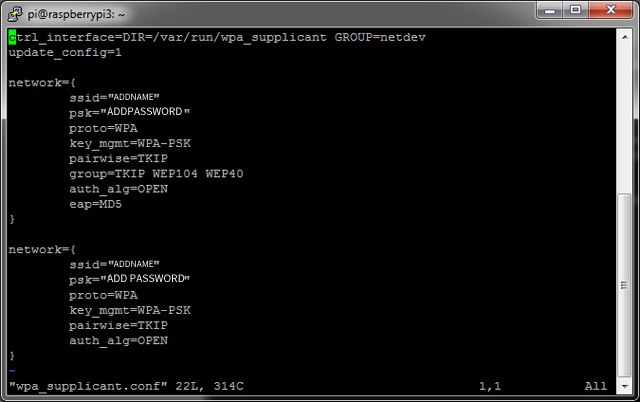
Your Raspberry Pi should easily connect to the Ethernet easily after you have Raspian or another distro setup on your SD card. However, using wireless could be simple, or it could take a little workover. This tutorial will show how to get that wireless internet working with a plug and play wireless adapter like ‘Ourlink’.
To enable wireless connection,
1) Open network-interfaces file
The Raspberry Pi can be used to build many projects. This tutorial will show you how to get started with your Raspberry Pi so that you can begin to explore and create many projects of your own.
2) Download Noobs or a raw image from Raspberry Pi website. This example shows the setup with ‘Noobs’. 3) Extract the file and copy the contents on the SD card.
3) Connect your Raspberry Pi to a usb keyboard, a usb mouse and a tv with a HDMI connection.
4) Plug in your Raspberry Pi and install Raspbian. You can enable features like boot directly to desktop, enable ssh and more.
5) Connect an Ethernet cable to the Raspberry Pi if you want to connect to the Internet.
If you have used Ubuntu or Centos, you may find that the when you use ‘vi’, everything works as you expect right out of the box. However, this may not be the case with a Raspberry Pi. The good news, is that you can install vim and get to the zone for which you are seeking. Another option, is to use the Nano editor for which many online tutorials are based on. For others, Nano may not be preference for any one who prefers vi.
To install vim,
root# apt-get install vim
Now, you can use some favorite commands like :q, :q!, :wq and :w
This simple tutorial will explain how to use your laptop or desktop computer as the monitor for your Raspberry Pi. In this example, it is assumed that you have a monitor connected to your Raspberry Pi. If you want to connect to a Raspberry Pi that is headless (no monitor attached), you can see go to this page.
Step #1 Install XRDP on the Raspberry Pi
root# sudo apt-get install xrdp
Step #2 Open Remote Connection
Option a) (Windows) Open Windows Remote desktop access Raspberry Pi
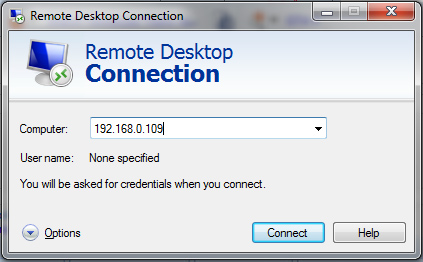
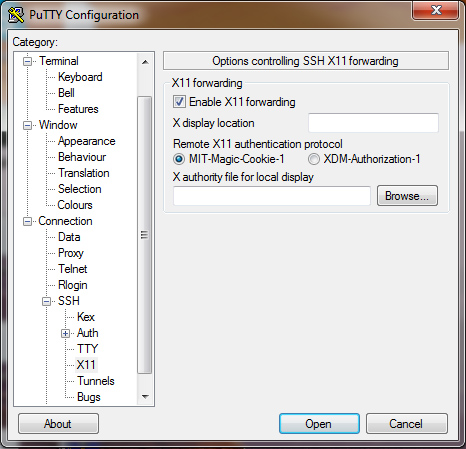
Option b) Use SSH(Putty) and install Xming in Windows. Then, connect to the internal ip, select x11 forwarding in Putty
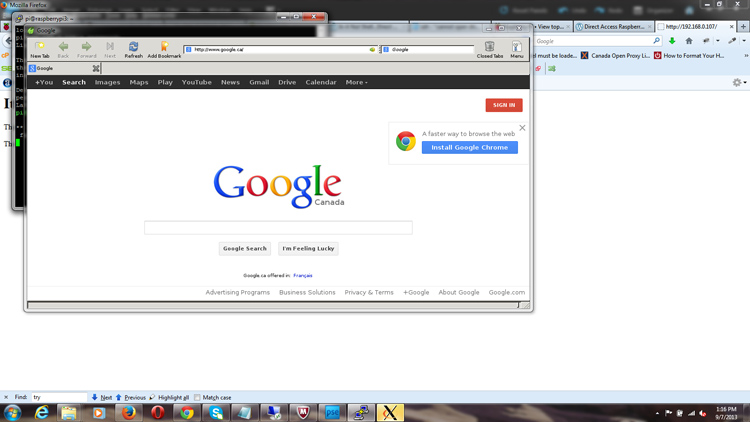
Install tightvnc server on any Linux or Raspberry Pi and use VNC Viewer from personal computer. If you want to use a ‘headless’ Raspberry Pi, read on. If you follow the following instructions, you can connect to your Raspberry Pi and use your monitor will deliver the Raspberry Pi desktop, even though it has no monitor connected. At this point, you can surf the Internet with Midori, use Sketch, or open a terminal to run shell commands. If you have the Raspberry Pi connected to a monitor with HDMI cable, you can go to this page for other methods for which to connect remotely.
root# sudo apt-get install tightvncserver
Select ‘Y’ when necessary and be sure to remember your password, if necessary.
To run the VN/C server,
root# vncserver :1
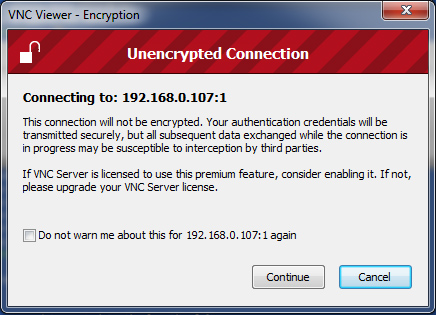
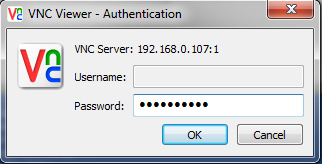
On a separate Linux Desktop or Windows pc, download VNC Viewer at http://www.realvnc.com/
To use VNC Viewer,
1) Open VNC viewer
2) Insert network IP address and password and connect.

You may want to install a Lighttpd server on a Raspberry Pi for many reasons. Some of the possible reasons are that you want to run a website from your home, you want to try out the Lighttpd Server, or, you want to test php scripts on your localhost.
Open your shell terminal and run the following commands to install the Lighttpd server with the ability to use php / mySQL.
Install Lighttpd
root# apt-get install lighttpd

Install PHP and MYSQL
root# apt-get install php5-common php5-cgi php5
root# apt-get install mysql-server mysql-client
Note: Hit enter on the keyboard when necessary

Enable Fast CGI Module
root# lighty-enable-mod fastcgi-php

Reload Lighttpd
root# /etc/init.d/lighttpd force-reload

Test server and php file
root# cd /var
root# mkdir www
root# chmod 755 www
root# cd /var/www
root# vi test.php
Write a php echo statement save the file.
Test Server and File
Open http://192.168.0.109/test.php
Open in browser http://192.168.0.109

When you pass through a magazine store or browse the web, you may have come across the words ‘Raspberry Pi’. It is getting lots of attention. Being the owner of three Raspberry Pis, I will try to explain what it is. The Raspberry Pi is a microcomputer. This microcomputer is designed to use an SD card as its hard drive which runs a Linux distribution. If you browse enough websites and forums, you will see how popular ‘Raspbian’ is for the operating system of choice. This microcomputer comes with two usb ports, 1 ethernet connection, 1 HDMI connection (for tv or monitor) and a power connection (like a cell phone power connection).
This microcomputer can be used to browse the Internet and run shell command just like a computer that runs Linux, such as a desktop computer or laptop. However, the performance will not make you throw away your laptop and the Pi will not be a great option for everyday computer use. If the Pi is not a great computer and a usb stick allows me to test and run Linux on my computers, then, why on earth would I want a Raspberry Pi? Well, the Raspberry Pi can be used as a tool to test and work with home web servers or connect to hardware to output results. Here is where its strengths lie. They are excellent devices to test Linux software and applications; such as heartbeat and clusters and take up no space at all. As far as a web server goes, it can help someone make the transition from shared hosting to Linux Administration. If you can manage a server at home and use shell commands, you would be better off than just diving in to a VPS or dedicated server without any knowledge at all.
External Hardware
Many hobbyists use the Pi to connect hardware and sensors and sensors to pins which can be used to gather data with Linux programs. Then, another language like Perl, Python, or PHP / mySQL can be used to output that data.

Owner of Fullstack Web Studio

Quality Coding

Digital Marketing
When Performance and Flexibility Matters
Affordable web design,custom web development and mobile apps for individuals and businesses.


Let us analyze your data and competition to acquire more traffic! Professional SEO content writer
© 2018 ALL Rights Reserved | Sitemap
Vancouver | North Vancouver | Burnaby | Richmond | Coquitlam | Port Coquitlam | Surrey | Langley | Maple Ridge | Mission | Abbotsford | Kamloops | Kelowna | Victoria | Squamish | Whistler | Pemberton