


So, you have spent hours and hours working with your Ubuntu Virtual machine to set it up just right. Meanwhile, your files and folders have grown to the point where you are running low on disk space. This should not have been a complete surprise since it probably has been a trend since you bought your first pc. Anyways, this post will help solve those issues and allow you to increase your disk space so you can move forward.
1) Make a clone.
2) Make sure you are not actively using the newly cloned virtual machine.
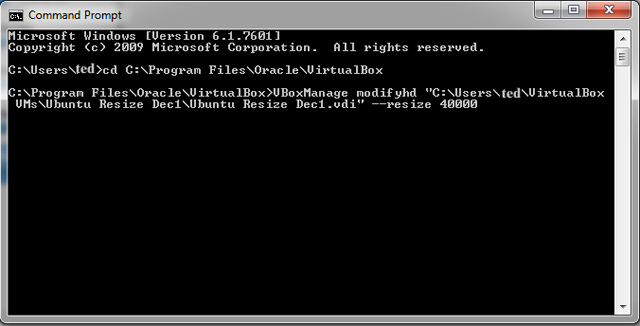
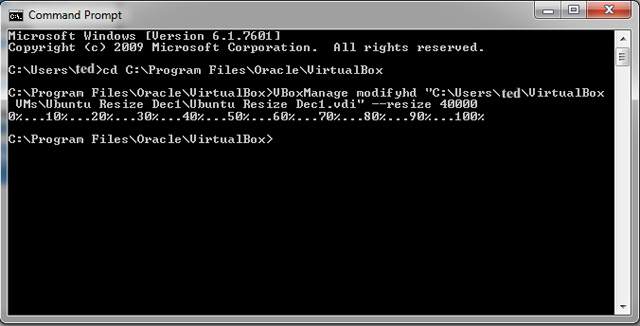
3) Increase disk space with the command prompt. This example uses Windows 7.
a) Open the folder with the Change Directory (cd) command. View images below, if necessary. cd C:\Program Files\Oracle\VirtualBox b) Run the VBoxManage file to resize the disk VBoxManage modifyhd "C:\users\ted\VirtualBox VMs\Ubuntu Resize Dec1\Ubuntu Resize Dec1.vdi" --resize 40000
4) Download the Gparted ‘Live’ iso. The file is about 165 MB. It can be downloaded here.
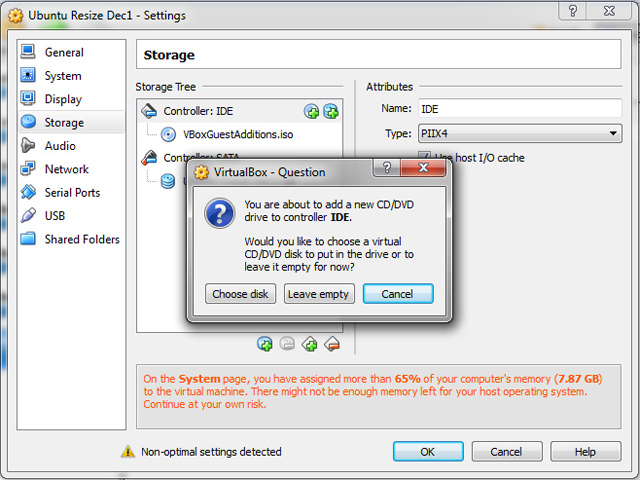
5) Add the Gparted ‘Live’ iso to the Controller: IDE list.
To add Gparted Live,
a) Select the clone > Settings > Storage > Under Controller IDE select ‘Add CD/DVD Device’ > Choose Disk >Select the Gparted live iso > OK.
Note: the disk size needs to be larger than the iso file. This example uses ~ 413 MB. See images below.


6) Start the virtual machine
Note: Gparted Live will boot
a) Select you language and all that jazz, Enlish may be somthing like 02 and your ‘GUI’ view may be something like ‘0’. Just hit ‘Enter’ on the keyboard after selecting your options.
Using Gparted
When Gparted opens, you will see the new unallocated space. In this case, 7.64 GB.
Now, here is where things get interesting because you want to increase the sda1 partition.
7) Increase the sda1 partition.
To increase the sda1 partition,
a) Delete the Logical partition (swap) > Select Apply. Make sure to run the operation.
b) Delete dev/sda2 extended partition from dev/sda > Select Apply. Make sure to run the operation.
c) Select partition /dev/sda1 >Resize / Move >
Note: Make sure to use all of the space. make sure to run the operation.
Altering the Virtual Machine Settings
8) Now, go back to your list of Virtaulbox machines and select your Virtual machine. In this example, the machine is called Ubuntu resize Dec1. Select ‘Settings’ >Storage and change Gparted from ‘Primary Master’ to something else. Change ‘VBoxGuestAdditions.iso’ to your ‘Primary Master’. The ‘Primary Master’ will be the iso which boots when you start a Virtual Machine. You want to start Ubuntu this time, not Gparted. Alternatively, you can remove gparted if you want.
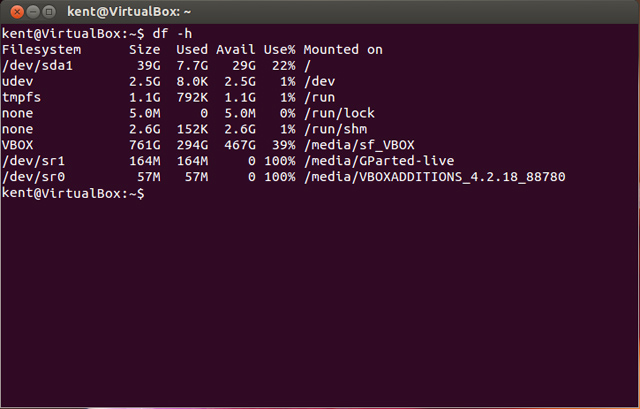
9) See the new changes in disk space. When you boot into Ubuntu and open the terminal, type df -h and you should see the newly added hard drive space.

Owner of Fullstack Web Studio

Quality Coding

Digital Marketing
When Performance and Flexibility Matters
Affordable web design,custom web development and mobile apps for individuals and businesses.


Let us analyze your data and competition to acquire more traffic! Professional SEO content writer
© 2018 ALL Rights Reserved | Sitemap
Vancouver | North Vancouver | Burnaby | Richmond | Coquitlam | Port Coquitlam | Surrey | Langley | Maple Ridge | Mission | Abbotsford | Kamloops | Kelowna | Victoria | Squamish | Whistler | Pemberton